Home > General Information > Working with Reports
Working with Reports
You have the ability to create custom reports directly in Web Tracks. This reporting feature allows you to create reports from single tables, predefined master/child relationships and by entering custom SQL statements.
Deleting a Report
Select a report from the list and click Delete. Be aware that you cannot undo the deletion.
Viewing a Report
Double click on the report in the report list.
Designing a Report
To add a report to Web Tracks, click the Add command from the Report List. Otherwise, select the report you wish to design and click the design command (it is not recommended to change the design of the built-in reports).
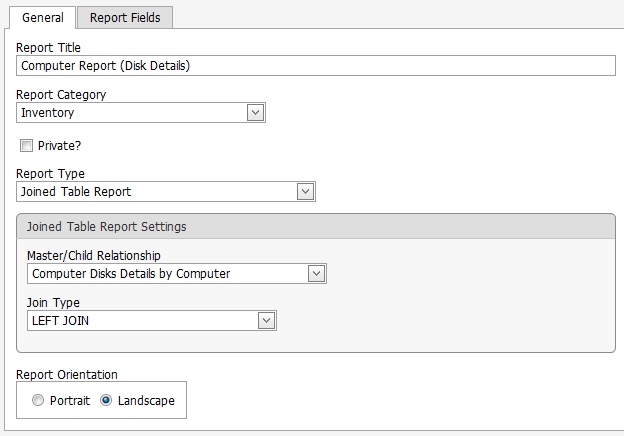
GENERAL TAB
Report Title
This is a descriptive name for the report and must be unique.
Report Category - This is the category to which the report will be assigned.
Inventory requires Web Tracks Inventory permissions to view.
Purchasing requires Web Tracks Purchasing permissions to view.
Help Desk requires Web Tracks Help Desk permissions to view.
Private?
If you check private the report will be only available to the creator.
If private is not checked the report will be viewable and designable by all users who have access to the graph category.
Report Type
Single Table Report - a single table report is ideal for most simple reporting needs. After selecting a table, you will be able to add any of the fields contained in this table to your report.
Joined Table Report - a joined table report is a little more complex than a single table report because it combines the results of two tables into one report. After choosing this option, you must select a predefined join clause in the database (Master/Child Relationship). Most of the descriptions for the joins are self explanatory. After selecting a join clause, you will be able to add any of the fields from the joined tables to your report.
Join Type -- If you selected a Joined table report, you then need to select a Join Type. There are three types of joins from which you can select.
- INNER JOIN -- Include records from the tables where the Join Fields are equal.
- LEFT JOIN -- Include all records from the Source Table and only the records in the Join Table where the Joined Fields are equal.
- RIGHT JOIN -- Include all records from the Join Table and only records from the Source Table where the Joined Fields are equal.
In the computer disk report example listed above, an INNER JOIN would not show computer records that do not have disks. A LEFT JOIN would show all Computer Records even if the Computer does not have any disks. A RIGHT JOIN wouldn't really apply to this report since all disks in the database are assigned to computers. So a RIGHT JOIN here would give you the same results as a LEFT JOIN.
Create a Report Using a Custom SQL Statement
Select this option to create a report using a custom SQL statement (for advanced users who are familiar will SQL).
Note:
Changing the report type, base table or master/child relationship will reset the Report Fields tab.
REPORT FIELDS TAB
If you selected a single table report or a joined table report, you then can add fields to the report field list. To insert a field in the report field list, highlight the field(s) from the 'available fields' list and move them it into the 'chosen fields' list. Click the up/down arrows to change the order of the chosen fields in the report.
If you would like to calculate on one or more report fields you can do so by selecting the field on which to calculate and then clicking the "ƒ" button. This will open a popup window where you can select the aggregate calculation to perform on the field. You may only perform calculations on fields that appear in the detail section of the report.
Sort by (1-3)
You can sort by any of the fields available to the report. Simply select the field you wish to sort from the drop down combo box. You may sort the report on up to three different fields.
Group by (optional)
This is an optional field. If you select a field to group on, you must include the field in the report. For a Joined table report, you can only select a field that is in the primary table.
Graph Filter
You may 'Pre Filter' a report by adding a filter to the report definition. This filter is stored with the report and is not removable when viewing a report. Reports may also be 'Post Filtered' when they are being viewed.
AUTO DELIVERY TAB
A powerful feature in Web Tracks is the ability to setup reports and graphs for automatic delivery through email.
Repeat Interval - Choose the day or days you want the report to be delivered.
Time of Day - Choose the time of day for the delivery.
Attachment Format - Choose the export format for the report (pdf, xls, xlsx, rtf, mht, txt, csv, or png).
Email Subject - The text to describe the report being sent.
Email Recipients - one or more email addresses are required. If multiple email addresses are entered separate them with new lines.
Note: The Web Tracks Windows service must be running to process the automatic delivery of reports and graphs.
See also
|